Primo depends on several [freemium] third-party services for easy hosting, authentication, database and storage, etc. Running your own Primo server is as easy as forking the Primo repo and deploying it on a static host like Vercel or Netlify, which should only take a few minutes.
Third-party services (all can be signed into with Github):
-
A modern web host like Vercel or Netlify to host the Primo application & published sites.
-
A Supabase account to manage your server's authentication, database, and file storage.
-
A Github account to deploy your sites to (unless you plan on downloading the site and connecting to a host).
-
Ensure you have an account with all the services listed above.
-
Create a new Supabase project, go to the SQL editor, add a new query and provision your project by copying the schema and pasting it into the editor.
-
Fork the Primo repository.
-
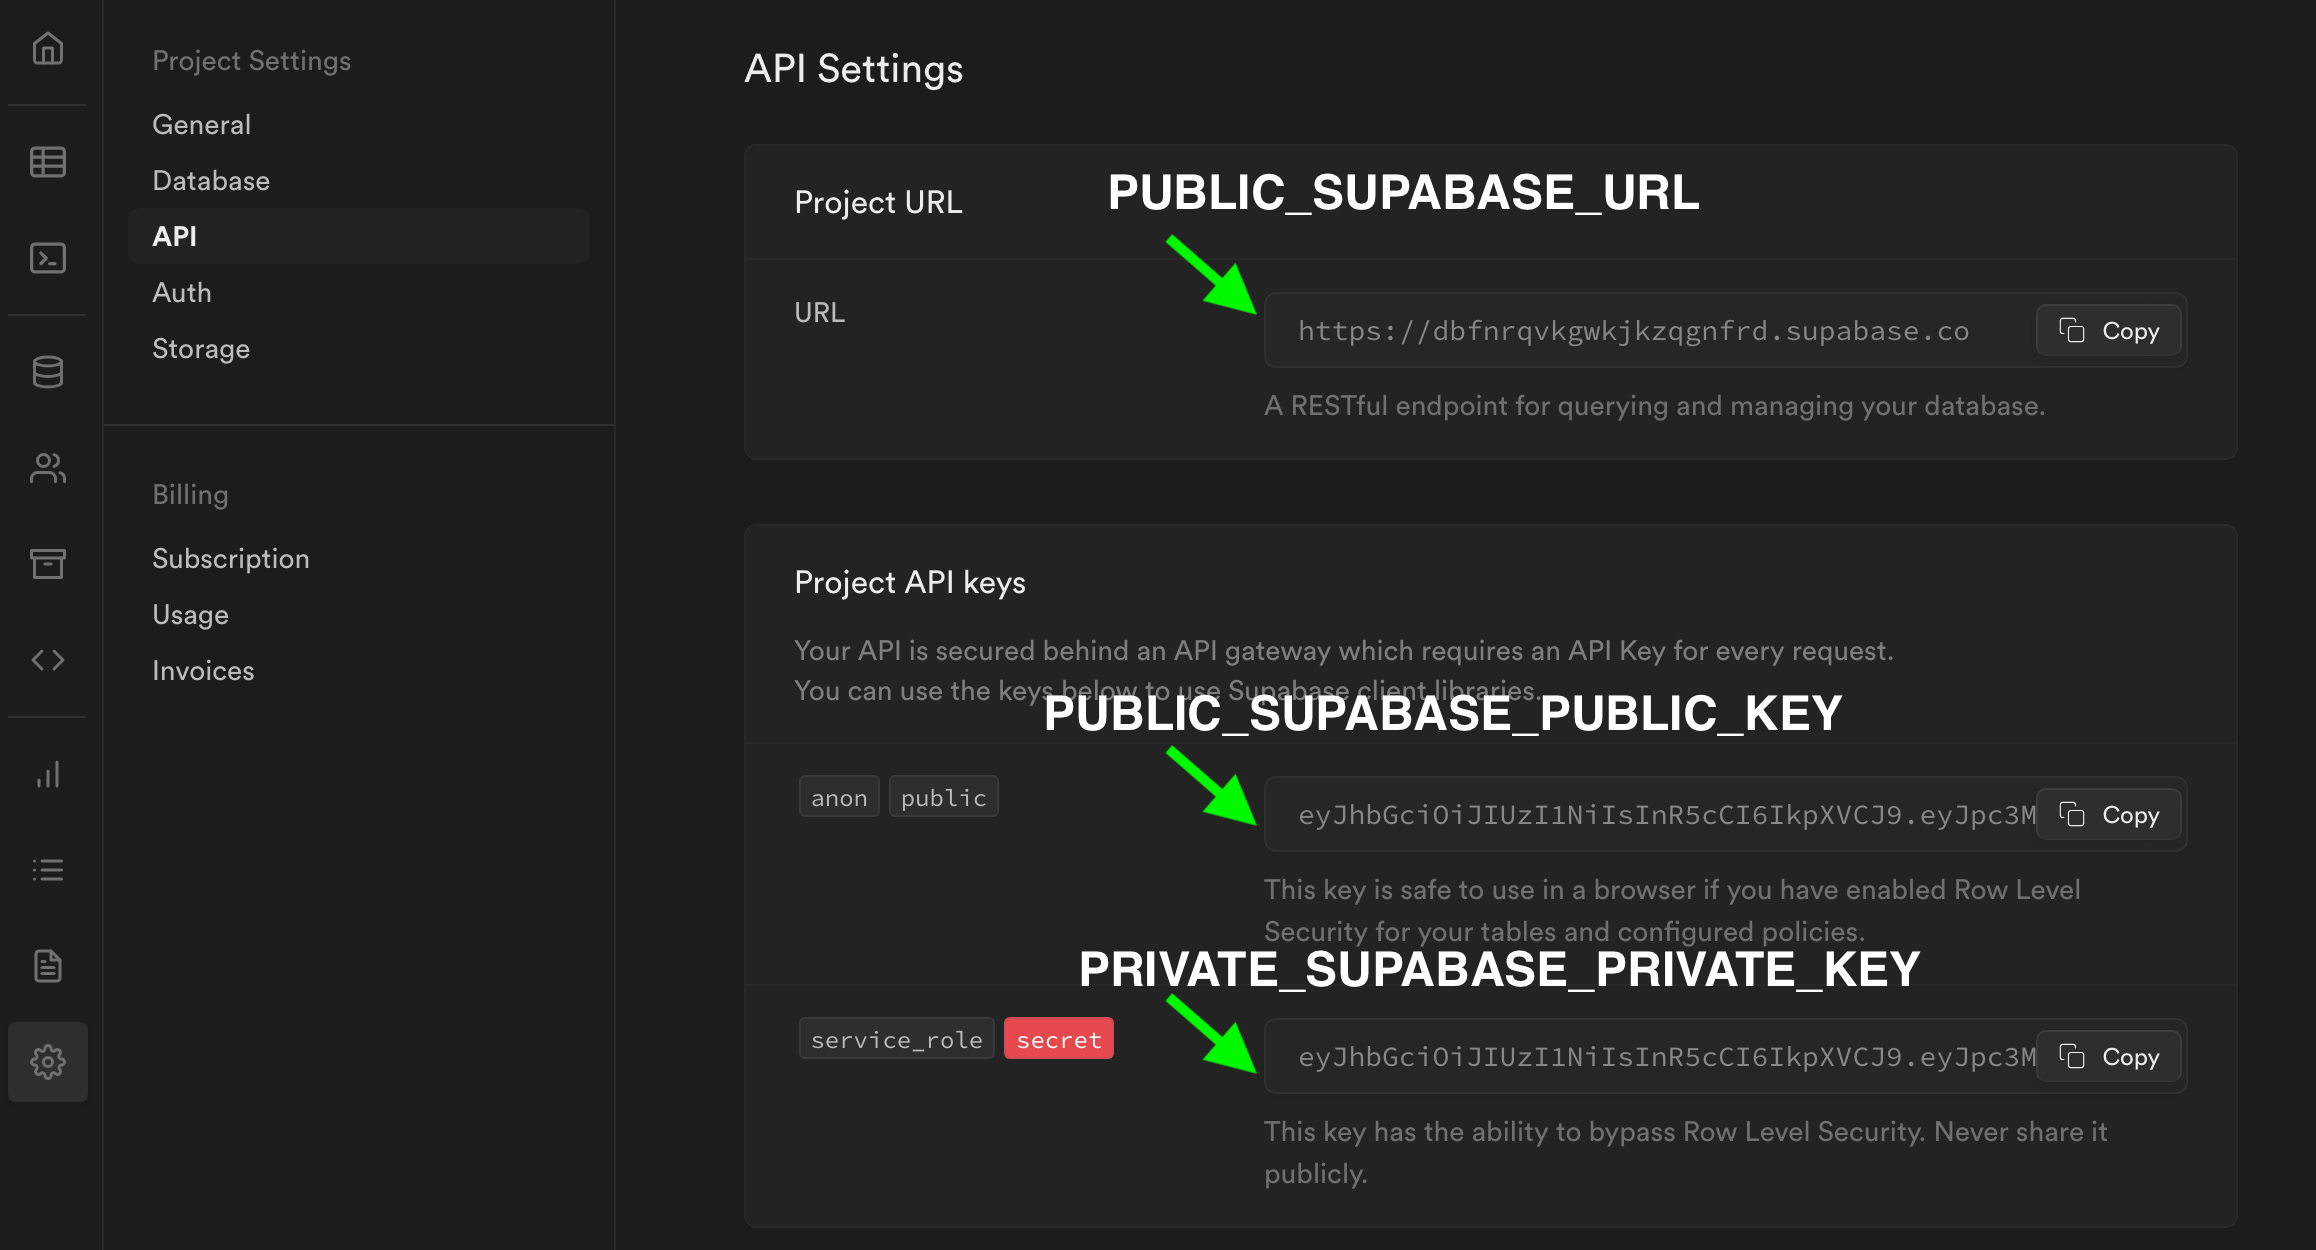
Go to your web host and create a new project from your new repository, inputting your Supabase details (go to the API settings) as environment variables.
-
PUBLIC_SUPABASE_URL
-
PUBLIC_SUPABASE_PUBLIC_KEY
-
PRIVATE_SUPABASE_PRIVATE_KEY
-
-
Publish the project and navigate to the Primo authentication screen.
-
The user account you create will be the server owner. You can manage the project's entire data from the Supabase project dashboard.
